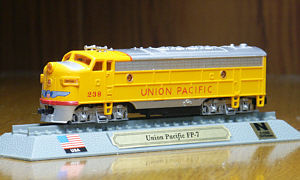
The EMD F series is a locomotive that is representative of America and has an impressive unique bonnet.There are quite a few models of the F series. F7 includes Kato, Life-Like, Lima, Bachmann, etc. F3 and FT are also available from several companies.Is the FP7 that we will be talking about this time just a little rarer compared to others?It is a locomotive.
The FP-7 N scale has been released by Model Power, and an upgraded version will be released soon.If you think about it that way, this remodeling might not make much sense (lol).So, for this modification, I'll do it in a random way (lol). Is it always a good idea? (Sweat)
First touch and check the body
As far as I can see from the shell, it's going pretty well. The number board, which tends to look unnatural on the F series, also looks nice. Considering it's 1575 yen, it's a good deal. Although it loses to Kato's F7, it has a quality that can beat Life-Like and Bachmann. The skirt is also made of plastic, so it looks like it can be used as is. The coupler hole may also be usable just by widening it a little.
What's interesting is that the coupler on the back is an N scale standard Arnold. Can I get a passenger car? However, since it is integrated with the trolley, it cannot be replaced with a magnetic one. Either way, it doesn't matter at all because it will be replaced with power (lol). The paint gives it a cheap look. This doesn't matter as it will also be repainted in Amtrak colors.
Disassemble immediately
As with FP-45, peel off the seal on the base and remove the screws.Then remove the two screws on the back of the car body and the body will come off. The headlights, side windows, and number board are all glued together, so it seems difficult to reuse them. I destroyed it and removed it. The cab window can be used again if carefully removed.
Once the body was covered, the striptease began.Soak it in thinner etc. to remove the paint. I use Mr. Color's Mr. Thin Liquid. Sometimes I smoke too much and my memory jumps (ooooo). If you put a small amount of paint thinner and body into a Zip-loc and shake it, you can get rid of it to a certain extent without worrying about the smell.
Power for now
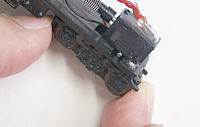
I was thinking of using the extra power from the F7, but the FP7 has a longer body, so it's not suitable.So he decided to use the power from a rotten Life-Like F40PH.Most F40PHs have the same weight as the F7, so they can be used properly with the FP7.However, please note that the shape may vary slightly depending on the lot.If it does not fit, you will need to make adjustments by cutting the inside of the body or scratching the weight.
It was a little long as is, so I cut off the tip of the chassis frame.Then it's mostly OK.Although the rear coupler is longer, the length still fits the body.Next, I used a file to file down the fuel tank and hook on the power side, and adjusted the body width so that it would not expand.I took the trouble to create a groove on the inside of the body where the nail can catch lightly.It was easier than I expected.
body adjustment
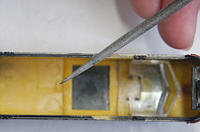
When using Lifelike power, the cart is quite large, so it comes into contact with the skirt near the tank when making curves.So, I shave it off a little bit as shown in the photo on the right.I also widened the hole for the front coupler a little and at the same time glued the mounting seat so that the body mount coupler could be attached.The rear coupler is a shoddy truck mount.
and painted
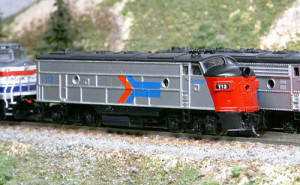
Amtrak's paint is basically the same, so it will be almost the same as FP45. FP7 was only used for a few years after Amtrak's launch, so it is a Phase 1 paint job.Some of you may think you've seen the Phase 2 and 3 paintwork, but it's probably a photo of E8 or FL9.Let's be a man and decide on phase 1 here (whatever this is).
Paint the whole thing silver like FP45.Mine is Tamiya aluminum silver.I used Tamiya's Silver Leaf before, but it was too flashy and I failed (lol), and the top and bottom of the roof were flat black, and the front was Mr.Color.StaffShine red is recommended.This time I used Italian red, but it was still a failure (lol)
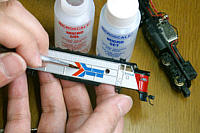
For the decals, I used Microscale No.60-100.If you look at the photo of the actual vehicle, you can see that under the side window of the cab is "Amtrak" in blue letters, Arrow, and the chassis number in blue letters on the back.Both sides are common.Real FP7 numbers are 110-123, or 492,493.I used the familiar Set and Sol to apply the decals.
after that
In the end, it was released by Model Power, so it was only half-hearted. If you want FP7, it seems better to buy the finished product (lol)
If you're looking for more detail, Intermountain also releases one.